venerdì 17 marzo 2017

'gala' in pizzo / jabot


Il Jabot è un accessorio indossato dagli uomini del alta società nel 17º e 18º secolo. Le donne hanno iniziato ad indossarlo per abbellire le loro camicette nel 19º secolo.

Spesso torna di moda in diverse varianti.  La stoffa più adatta è il pizzo.

Io l'ho creato per un costume di carnevale da pirata.

Occorrete:

  • 2 metri di nastro di pizzo alto 6cm,
  • 25cm of tessuto dello stesso colore del pizzo, 
  • 50cm elastico largo 1cm,
  • forbici, cotone per cucire, ago e spilli,
  • Un po'di carta per il modello, riga e penna,
  • macchina da cucire.

Metodo:
Jabot con 4 volantini di pizzo.

Fate il modello come segue:
Iniziamo con il bordo superiore di 8cm.AB
Se usate pizzo largo 6cm, calcolate 5 cm per ogni volantino, in tal modo che i volantini vengono un po' uno sopra l'altro.
Il bordo inferiore deve essere a 20cm (5cm x 4 volantini) e deve misurare 14cm. CD
Unite il bordo laterale AC e BD.
Poi aggiungiamo il bordo superiore EF, che serve per rifinire il lavoro è passare l'elastico.

Il modello è pronto.


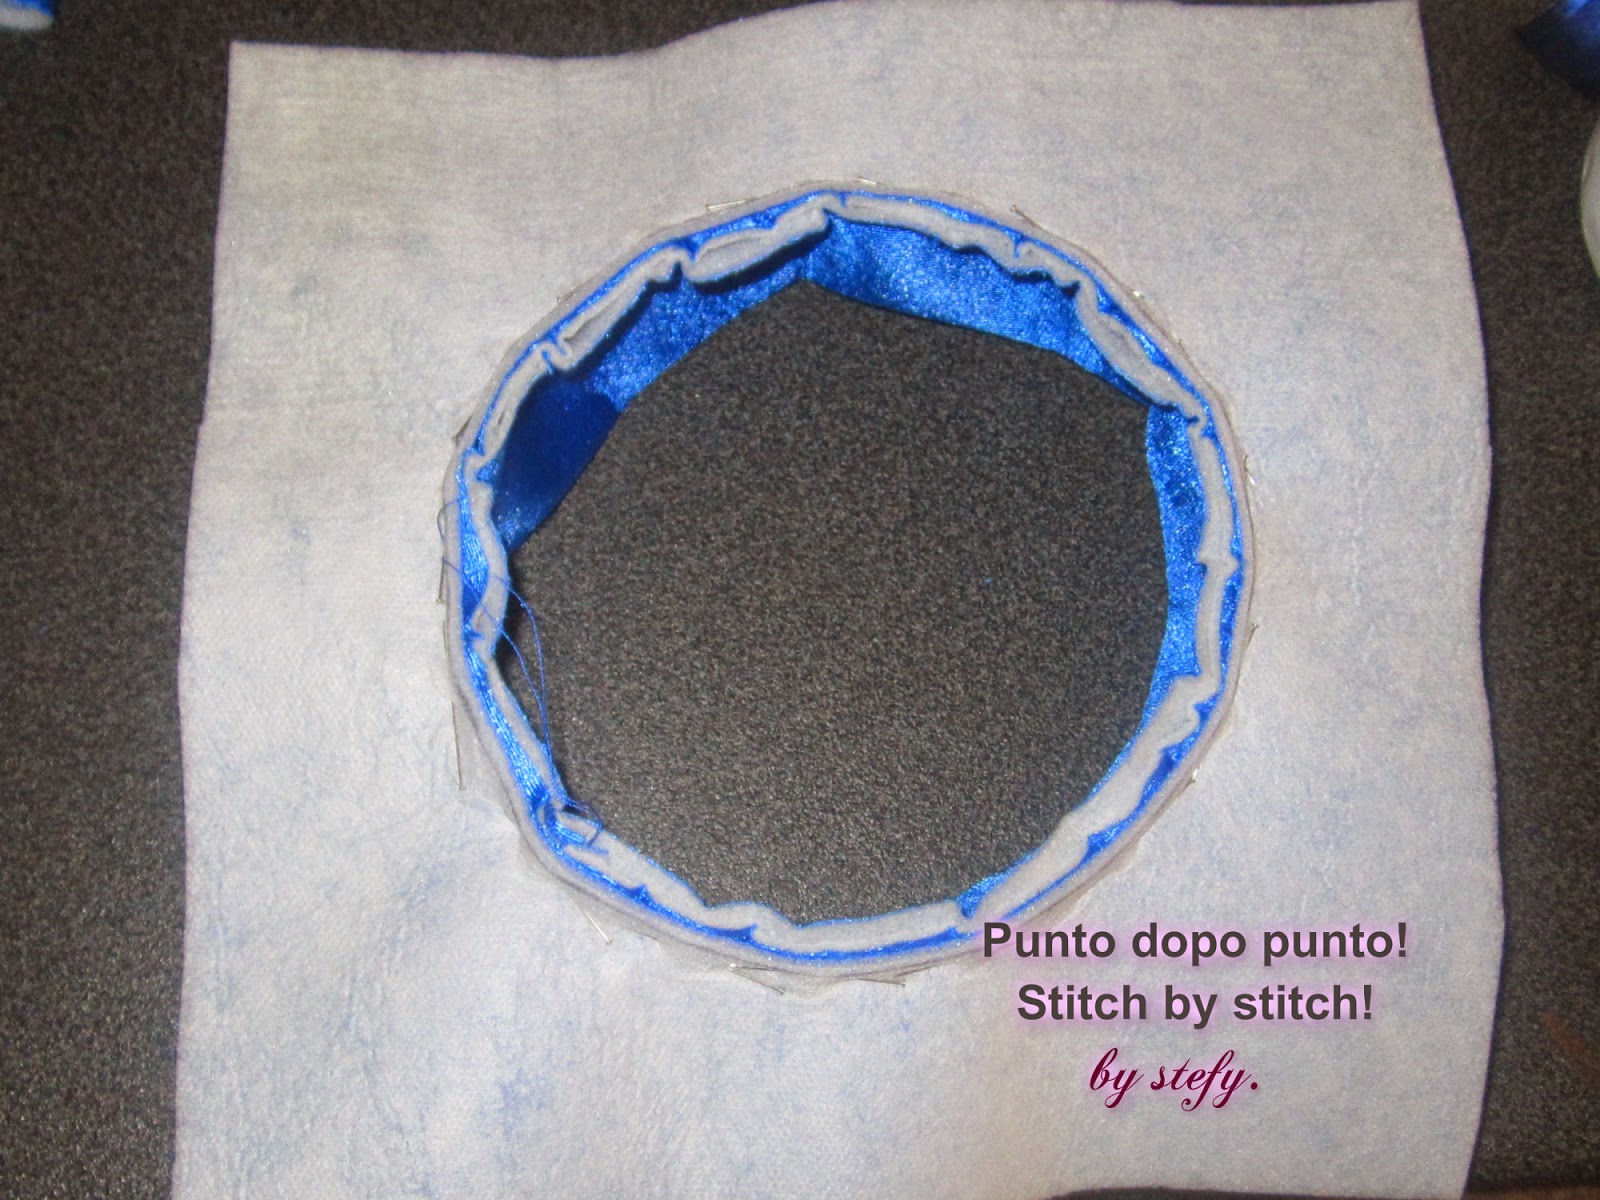
Appoggiate il modello sulla stoffa piegate in due, diritto con diritto. Si taglia la stoffa.
Ricordate di tagliare 1cm in più tutto attorno per le cuciture.


È il momento di cucire il bordo laterale e inferiore.  Lasciamo il bordo superiore aperto per girare il lavoro.  Dato che non è un progetto grande si può anche cucire a mano.

Tagliate la stoffa in eccesso  e girate sotto sopra.


Spingete gli angoli con un attrezzo appuntito.  Sistemate i bordi belli piatti con gli spilli e impunturare.

Orlare la parte superiore del jabot, lasciando abbastanza spazio per passare l'elastico.


Ora passiamo al pizzo.
Tagliate 4 pezzi con le seguenti misure: 25cm, 35cm, 45cm e 55cm.
.          
                 

Orlate i bordi del pizzo per un lavoro più pulito, e arricciare il pizzo alla misura giusta.


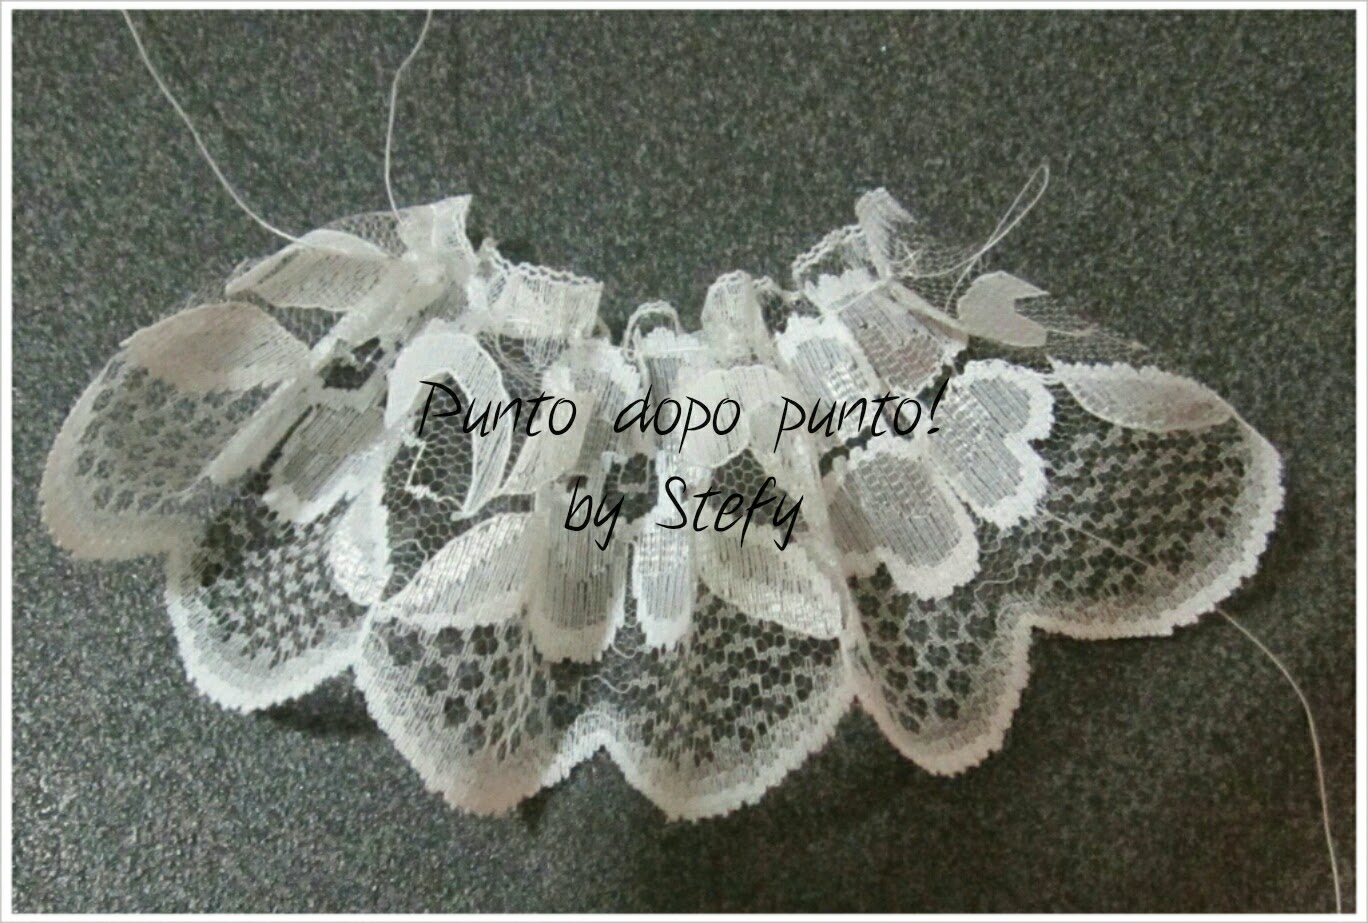
Iniziate con il volantino più piccolo, che va cucito al bordo superiore ed a seguire gli altrimenti tre volantini.


Passate l'elastico nel orlo superiore.


Punto dopo punto! by Stefy.

How to make a Jabot.

How to make a Jabot.


A Jabot is a clothing accessory made of lace or other light fabric, used to decorate the front of shirts.
In the 17th and 18th century Jabots were used to decorate higher class man's shirts whilst in the 19th century they were attached by brooches to woman's clothing.

Over the years we have seen that they came back in fashion, but my personal need to sew a Jabot was to decorate my son's carnival pirate shirt.


Requirements:

  • 2 meters of ribbon lace 6cm high,
  • 25cm of fabric the same colour of the lace,
  • 50cm of elastic 1cm wide,
  • scissors, sewing thread, needle and pins,
  • a piece of paper for the pattern and a ruler,
  • sewing machine.

Method:
Jabot with 4 layers of lace.
Prepare pattern by drawing top edge 8cm wide.AB
If you use 6cm wide lace leave an allowance of 5cm for every frill, in order to slightly overlap the frills.

Bottom edge 14cm wide. CD

Join diagonal lines AC and BD.

Then draw top hem allowance 2.5cm high in order to be able to pass the elastic.  EF

Remember to leave hem allowance of 1cm on side and bottom edges.


Fold fabric right sides together, and pin paper pattern.
Cut fabric and baste sides (AC and BD) and edges (CD).
Sew with sewing machine.  As this is not a
very big project to create, you can also hand sew.
Leave the top edge open in order to enable us to turn the fabric.


.

Turn the fabric, by pulling the bottom edge toward the top edge.   Push the corners in place with a long pointed object, being careful not the damage the seam.

Pin edges smooth in place and sew the edges.


Hem the top edge, keeping in mind that we have to pass some elastic through the hem.


Now we have to prepare the lace.  Cut 4 pieces in the following sizes.  25cm, 35cm, 45cm and 55cm.
.            
                 

Hem the side edges of all four pieces of lace.
Gather to the measurement required.
Tip:   I normally use the biggest straight stitch available on the sewing machine to gather frills.  Sew a straight linea and then pull the top thread.


Pin the gathered lace in place. Of course the shortest frill goes at the top.
When you are happy with the result, baste in place to have a neater finishing and finally sew either by machine or by hand the frills in place.


Pass some elastic between the top hem.


Punto dopo punto! by Stefy.

Come fare un Jabot

giovedì 25 dicembre 2014

Tutorial: Christmas decoration in cross-stitch.

PER LA VERSIONE IN ITALIANO CLICCA QUI

I have started to work cross stitch many years ago and surely its the manual work that I love most. Over the years I did several projects to gift to friends, but unfortunately I have no pictures of my creations.
Since I became a mum for the second time,  time is never enough to cope with all the family needs, and I gave up on cross-stitch until last month a friend told me that she was looking for a birth sampler, for the birth of her daughter. She didn’t know that cross-stitch is one of my passions, so I surprised her with a lovely present.

This was what I needed to get me started again. I took some time to organise all my cross stitch threads , needles and patterns and as it was December I decided to start with cross-stitching two Christmas decorations for my kids.


Personalised Christmas Decorations. 


Requirements:
  • styrofoam ball (circumference 30cm),
  • satined fabric,  
  • aida fabric, 
  • 50cm cord and some ribbon, 
  • thread and needle for cross-stitch, 
  • scissors, nailfile, cutter and sewing pins,
  • glue-gun.

Method: 

Insert a sharp cutter all around the circumference of the styrofoam ball, to form a sort of gap. It should be about 3mm deep. 

I found some red satin in my work box and I decided to use it.
By the way whenever I start a new creation, I always try to use material available at home, before buying new material. So I opted on red, but you can use other Christmas colours like gold, silver, green and blue. 

Next step is to measure the circumference of the ball and cut the material you have chosen in a circle with a diameter that measures half the ball's circumference plus 1cm. In my case the ball's circumference was 30cm, so my circle in fabric measured 16cm in diameter.
Now comes the tricky part. Pin the material on the top of the ball with some sewing pins and slowly start to insert the edge of the material in the gap you have created before, with a metal nail file. I inserted the material in four cardinal points and then slowly the rest of the material, trying to smooth the pleats as much as possible. Do not worry if you have little pleats, they will be later covered. 

Next step is to cut the aida fabric to the same measurement of the previous circle. Choose your cross stitch pattern and after finding the centre of the aida fabric, cross stitch it.

When you are satisfied with your work, repeat the same procedure you have used with the coloured material i.e. tuck in the edge of aida fabric in the gap. Cut off any excess material.

At the centre top I inserted a loop which I formed from some ribbon, in able to hang the ball.  To cover the gap where the fabric has been inserted, I used a red cord which I glued using the glue gun and finally a little red bow on top.


Hope you enjoy this and thanks for following.

POTETE LEGGERE LA VERSIONE IN ITALIANO QUI.

by stefy.


martedì 23 dicembre 2014

Tutorial: How to make a tassle.

per la versione in italiano, cliccate qui


A tassle is a decoration made from thread or wool.  Mostly tassles are used to decorate soft-furnishing like curtains, cushions etc and are also used on clothes, jewellery, hats and hoods.

We can create different sizes of tassles by using different thickness of thread or wool. 

I had to sew some degree hats with a tassle on the top (tutorial - how to sew a degree's hat),  and to save some money I decided to create my own tassles and luckily I also found in my work box, the exact colour of embroidery thread I needed.


Requirements:
  • embroidery thread or wool  (the thicker the thread, the thicker the tassle),
  • a piece of cardboard 6cm wide. The length has to be the same as your tassle's finished length.
  • scissors

Method:

Knot the thread around the cardboard's length.  Now you have to wrap the thread on the cardboard several times, until you reach the volume required.
My thread was not very thick and I wrapped it 50 times around the cardboard, even because I didn't desire a thick tassle.


When you reach the desired volume, cut the thread.  Leave the thread on the cardboard.


Now,  we have to form a cord from the same thread we are using. I created a plaided cord with 18 theads.  If  your thread is thicker or you are using wool,  reduce the threads to 12 or 6 (the number of threads you use, has to be divided in three parts, because we need three bunches of thread to form a plaid).

The length of the threads to form the plaid has to be 3 times the finished plaid.  For example:  if we need a plaid 6cm long, we have to cut the threads 18cm long.
Place these threads under the wrapped thread on the cardboard.  Pull until you reach two equal lengths and make a knot.


Separate the threads in three bunches and make a plaid.  When you reach the desired length, knot the thread to stop the plaid from opening.


Now you can take out the thread from the cardboard. Cut the edges at the lower part of the tassle, exactly at the centre.


The last step is to wrap the thread several times 1cm / 1,5cm under the top of the tassle.  Wrap the thread until you reach the desired thickness and length.   Knot the thread and cut the ends to the same length of the tassle.


And you tassle is ready to be hanged.

Visitate la versione in italiano: tutorial - come fare una nappa.

  Stefy.

lunedì 22 dicembre 2014

Tutorial - how to sew a degree's hat.


In Italy, it has lately became a tradition, that when kids finish their kindergarten school, they are awarded with an end of kindergarten certificate, called 'diploma'. For this occasion they are dressed like university graduates. Last year even my son has received his 'diploma', so I prepared for him and his classmates, a degree’s hat made in fabric.


It’s not difficult to create and I also published some photos for a better explanation.

FOR ITALIAN VERSION PLEASE CLICK HERE.


Requirements:

  • 30cm of foamfabric (fabric with a layer of thin foam already attached)
  • 1.5mtr bias satin ribbon 2cm wide, same colour of fabric,
  • Some cardboard same colour of fabric,
  • Scissors, sewing thread and needle, sewing pins,
  • Crochet thread to make a tassle,
  • Sewing machine,
  • Glue gun.


The measurements that I have used, are for 5 year old children with head’s circumference of about 49/51cm, but when I tried out the hat it also fitted me, cause it only has to be placed on the head.  I attached some elastic, so as not to loose the hat.


Method:

pic 1 (the circle is not in photo)

From the foamfabric (pic 1) cut:
  • two squares measuring 25cm
  • a rectangle 56x16cm. (pic 1)
  • a circle with diameter 16cm


pic 1a


From the cardboard (pic 1a) cut:
  • a square measuring 24cm
  • a circles with diameter 16cm.


On one of the squares on the wrong side of fabric, find the centre and draw a circle with diameter 13cm (pic 2).     Cut out the circle (pic 3).

pic 2

pic 3


Close the rectangle by sewing the short ends 1cm away from border, to form a ‘crown‘ roughly measuring 54cm (pic 4)

pic 4

Fold the crown lengthwise, in order to have the foamy part of the textile on the inside (pic 5)
pic 5

Next step to the attach the borders of the crown to the circular border we have prepared before.  Place the borders of the crown and insert them inside the circle’s border and pin in place.  Should the crown result a bit longer, make very little pleats to reduce the length.  Sew with sewing machine and when you’re done, snip the edges (pic 6)
 

pic 6

Now place the other square, on the square with the crown, wrong sides together and pin in place. Apply the bias tape all around the edges
,  taking extra care to the corners.  Sew bias type with sewing machine and then sew the corners with thread and needle, with little invisible stitches.

  
To obtain a rigid hat, insert the cardboard (square measuring 24cm) in the inside of the hat.  The easiest way to insert it, is by folding the corners as in pic 6 and 7.
pic 6


pic 7


Glue together the circles from foamfabric (foam on the inside) to the cardboard.  Glue to the inside of the crown, to have a neat finish.  When I prepared the hats,  I had a very tight deadline,  so I only glued the cardboard to the hat  (pic 8).
pic 8

To finish of the hat we have to attach a tassle either of the same colour or with a contrast colour.


If you wish to prepare the tassle follow my tutorial - how to make a tassle

Sew the tassle at the centre of the hat.


Thank you and see you next time!!

POTETE LEGGERE LA VERSIONE IN ITALIANO, QUI / for italian version click here..

Stefy

domenica 19 gennaio 2014

Fioccho nascita e bavaglino

Nel primo post che ho pubblicato, ho parlato di come ho ripreso a lavorare il punto croce dopo essere costretta di smettere per 5 lunghi anni, dopo la nascita del mio secondo figlio. 

Una bellissima bimba nata a Novembre 2013 è stata la ragione per cui ho ri-preso di nuovo l'ago e il filo del punto croce in mano. 

Quando la mia amica mi ha detto che cercava un fiocco per la nascita di sua figlia, io mi sono offerta di ricamarle uno.  Lei ha scelto il fiocco e io il ricamo.  Ecco qui il fiocco di nascita che ho ricamato per Aurora.


Sono riuscita anche a ricamare giusto prima di natale, un bavaglino con scritto 'il 1° natale di Aurora'.


Se siete interessati ad ordinare delle creazione simili in punto croce, non esitate a contattarmi per informazioni.


Stefy.

sabato 11 gennaio 2014

Tutorial - come fare una nappa

Punto dopo punto..... Come fare una nappa.


La nappa è un ornamento molto usato per decorare le tende, cuscini, vestiti, cappelli, cappucci e anche bijuox. Si possono creare di tante misure usando tanti tipi di fili.

Quando mi è stato commissionato di fare dei cappelli per laurea,  (tutorial - come fare un cappello per laurea in stoffa),  per risparmiare sui costi ho deciso di crearle a mano, e per fortuna a casa avevo anche il filo con il colore giusto.

Occorrenza:
  • filo per ricamare o lana a vostra scelta (più grosso è il filo, più grossa viene la nappa),
  • un pezzo di cartoncino largo 6cm e lungo quando la lunghezza della nappa che desiderate fare,
  • forbice.


Procedura:


Girate il filo intorno la lunghezza del cartoncino e fate un nodo.
Avvolgete per tanti volte il filo intorno al cartoncino, finché raggiungete il volume che desiderate ottenere.
Il filo che ho usato io era sottile e ho fatto circa 50 girate, perché non desideravo una nappa molto grossa.

Quando ottenete il risultato desiderato tagliate il filo.  Lasciate il filo sul cartoncino.

Ora dobbiamo formare un cordoncino, per legare la nappa ed anche per poter appenderla dove desiderate.
Io ho formato un cordoncino a treccia con 12 fili.  Se il vostro filo è più grosso diminuite il numero di fili a 9 o a 6 (basta che è un numero divisibile con 3,  perché per fare la treccia, ci servono 3 estremità).

La lunghezza di questi fili deve essere tre volte in più della lunghezza che volete ottenere.  Per esempio se vi serve un cordoncino di 6cm, tagliate i fili 18cm .

Passate i fili per formare il cordoncino sotto il filo che avete avvolto sul cartoncino.  Tirate i fili fino a meta e fate un nodo.


Separate i fili per avere tre estremità e fate una treccia.  Quando arrivate alla lunghezza desiderata fate un nodo per fermare la treccia.


Ora con attenzione potete sfilare il filo dal cartoncino e tagliare a meta la parte inferiore della nappa.


Per ultimo dovete avvolgere il filo intorno alla nappa, circa 1cm / 1,5cm sotto la punta superiore.  Avvolgete finché ottenete lo spessore e larghezza che desiderate.  Annodate il filo e tagliate il filo della stessa lunghezza della nappa.


E la vostra nappa e pronta.

Sperimentate con fili di spessori diversi, per ottenere risultati diversi, potete anche giocare con  fili di colori diversi e oltre avere la soddisfazione di averla creata voi, risparmiate un sacco di soldini. 

Ciao,  alla prossima.

You can read the English tutorial:  how to make a tassle.


Stefy.